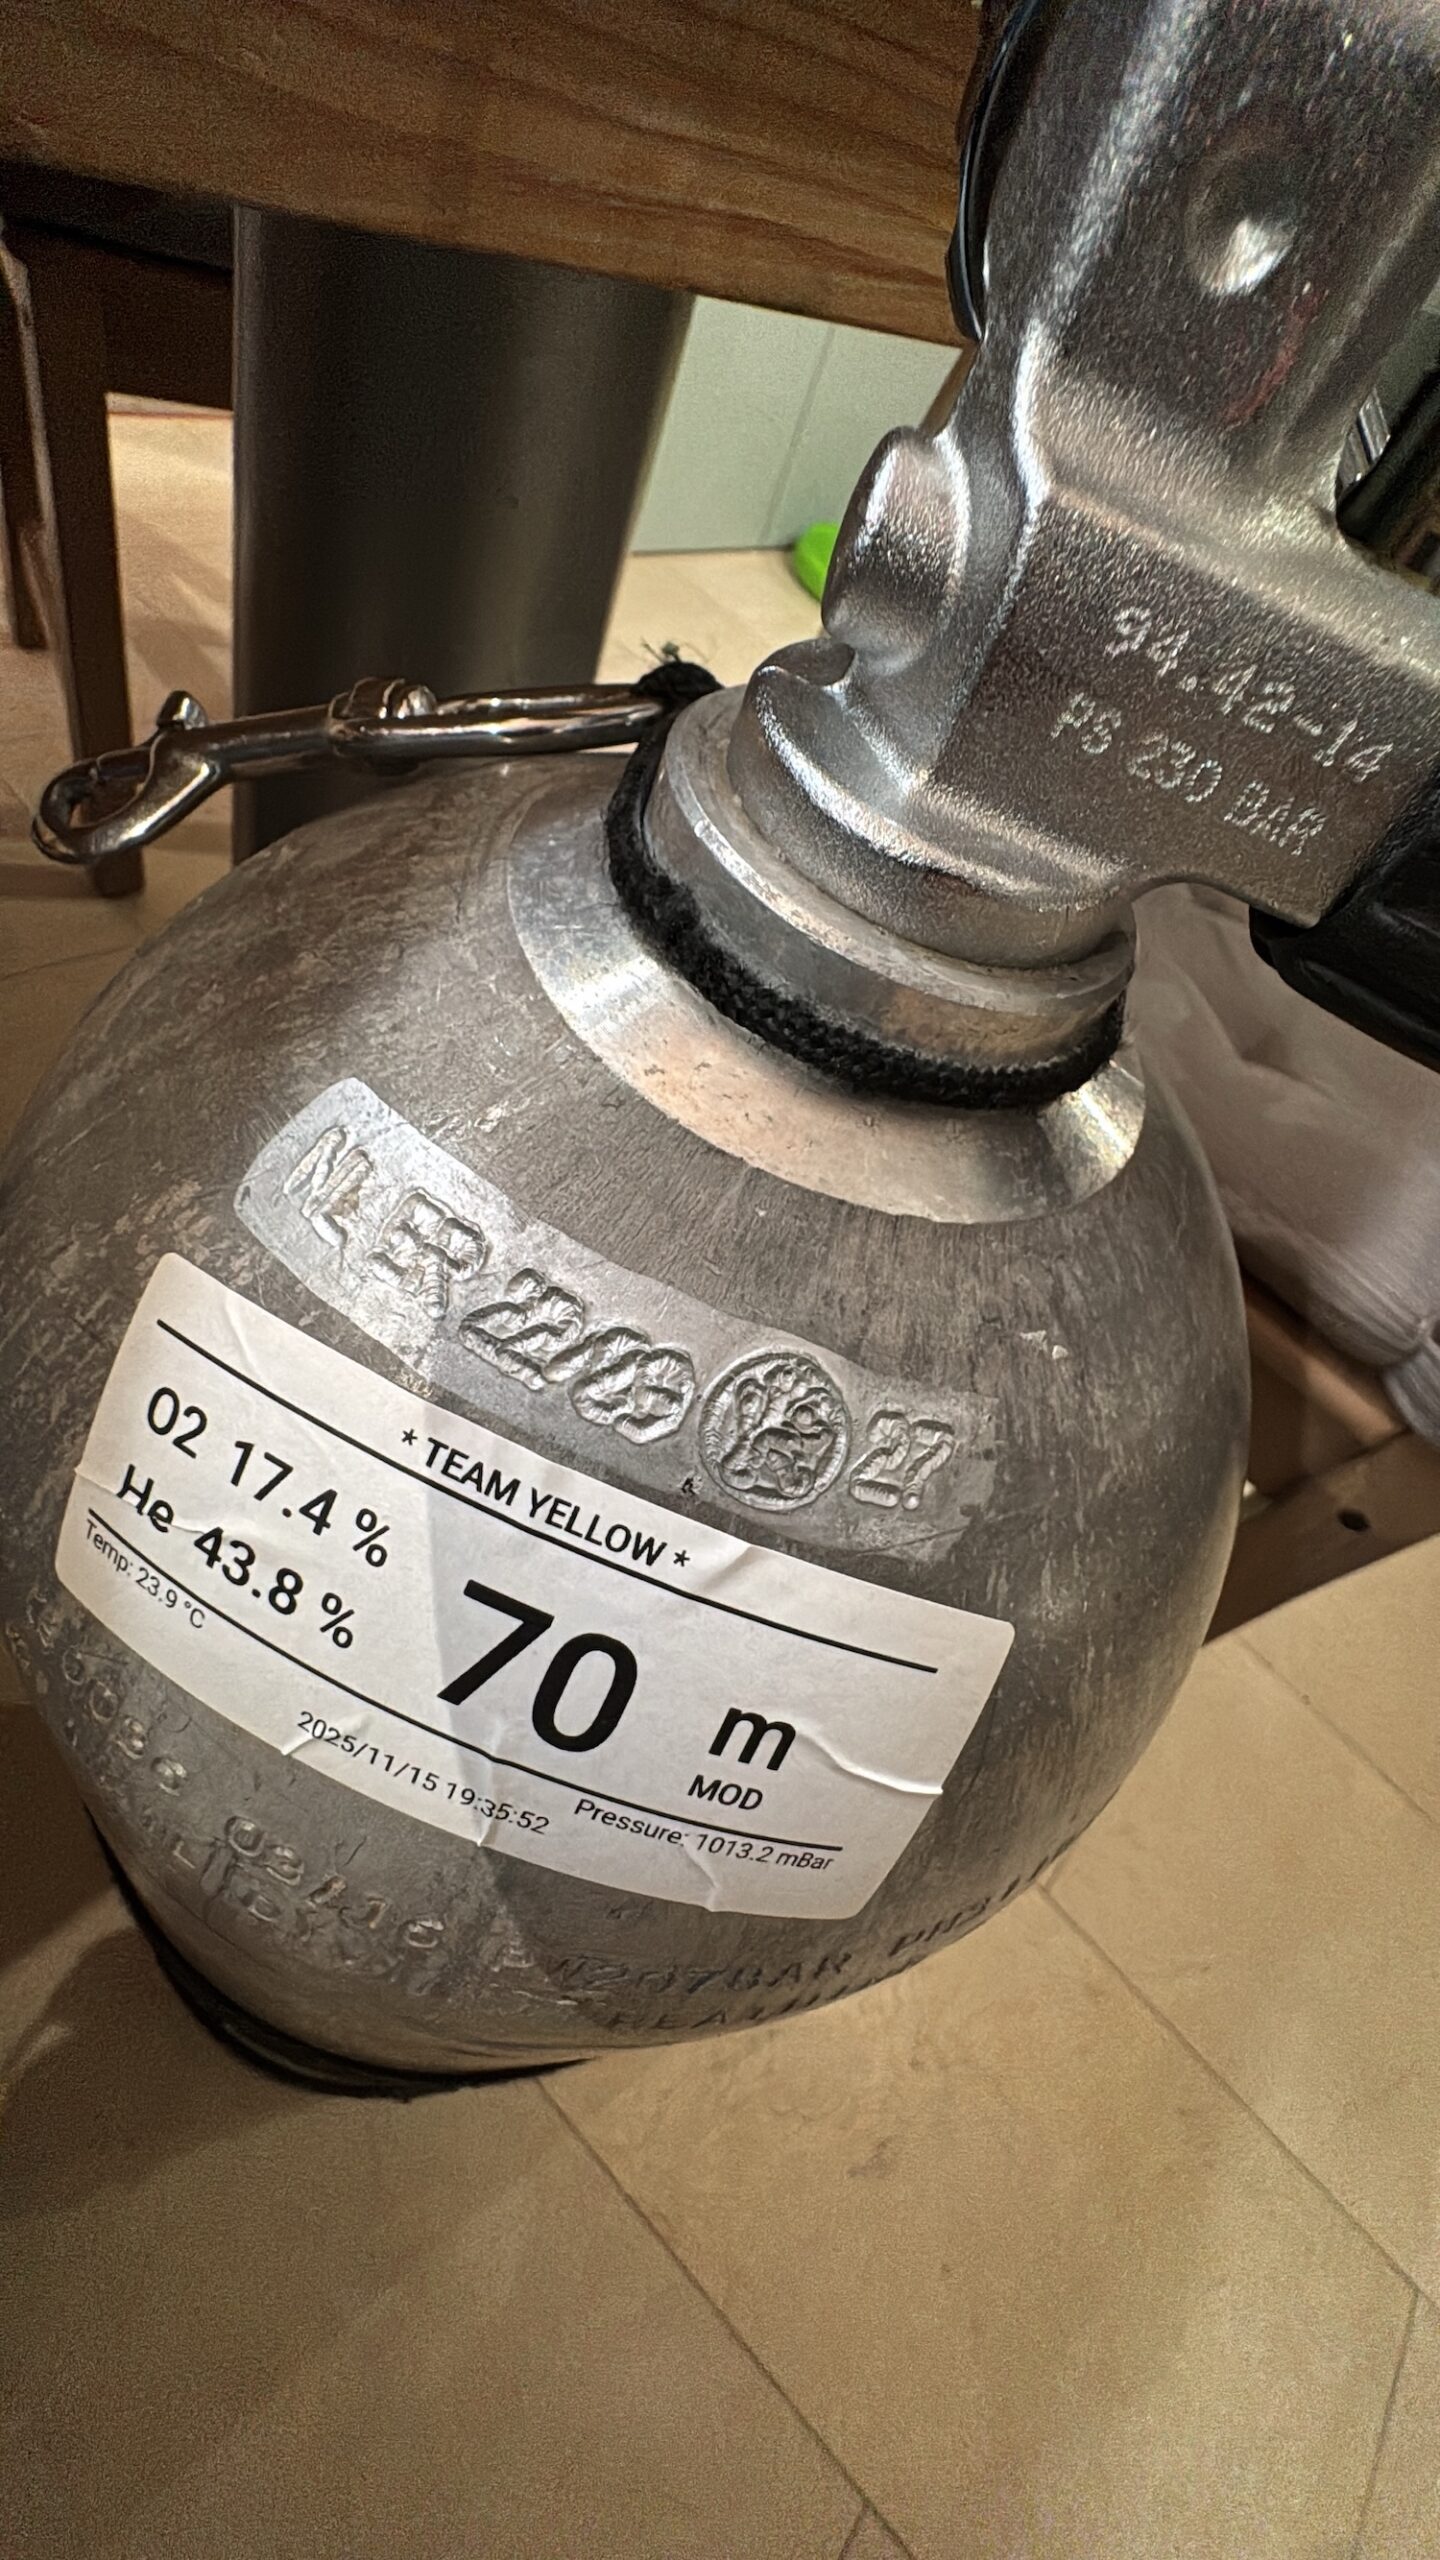
MOD sticker printer
Easy way to create labels for your tanks after analyzing
Do you like printed MOD labels?
I guess so, so do I!
Please following this simple tutorial below and you will have some fun with you Divesoft analyser.
This is a hobby project started as a joke.
I cannot give any support or guranty.
USE AT YOUR OWN RISK!
Diving with mixed gasses is serious shit!
Okidoki, legal stuff is done... lats have some fun now.
Download the image with THIS LINK.
Below a full description how to do it, remember that Chatgpt is your friend ;-)
***** Update : on request the Node Red as flow download : link
Prepare the Divesoft SD card and Raspberry Pi
1. What you need
Before you start, make sure you have:
- A Raspberry Pi Model 3-4-5 will do the job
- A reliable power supply for the Raspberry Pi
- A wired network connection (Ethernet cable to your router/switch)
- A micro-SD card of 32 GB
- An SD card reader (built-in or USB)
- The downloaded image file:
divesoft.img.xz - Optional, but recommended for setup:
- Monitor + HDMI cable
- USB keyboard (and optionally a mouse)
- The printer i used is a dymo labelwriter 450, also tested on a brother ql-1110. Any printer that runs with linux ( cups ) will do the job.
Warning: Writing the image will erase everything on the SD card.
2. Write the divesoft image to the SD card
Option A – Windows (Raspberry Pi Imager)
Step A1 – Install Raspberry Pi Imager
- Open your browser and go to: https://www.raspberrypi.com/software/
- Click Download for Windows.
- Run the installer and follow the steps.
- Start Raspberry Pi Imager.
Step A2 – Insert the SD card
- Put the 32 GB micro-SD card into your SD card reader.
- Plug it into your PC and wait until Windows detects it.
Step A3 – Select the Divesoft image
- Open Raspberry Pi Imager.
- Click Choose OS.
- Scroll down and select Use custom.
- Browse to your downloaded file and select
divesoft.img.xz
(you do not need to unzip it).
Step A4 – Select the SD card
- Click Choose Storage.
- Select your 32 GB micro-SD card from the list.
Double-check the size so you don’t select the wrong drive.
Step A5 – Write the image
- Click Write.
- Confirm that the SD card may be erased.
- Wait until writing and verification are complete.
- Click Continue when it’s done.
- Safely eject the SD card in Windows (Eject icon in the taskbar).
- Remove the SD card.
Option B – macOS (Raspberry Pi Imager)
Step B1 – Install Raspberry Pi Imager
- Open your browser and go to: https://www.raspberrypi.com/software/
- Click Download for macOS.
- Open the downloaded .dmg file.
- Drag Raspberry Pi Imager to your Applications folder.
- Open Applications and start Raspberry Pi Imager
(click Open if macOS asks for confirmation).
Step B2 – Insert the SD card
- Insert the 32 GB micro-SD card into your SD adapter/reader.
- Plug it into your Mac.
- The card should appear on the Desktop or in Finder.
Step B3 – Select the Divesoft image
- In Raspberry Pi Imager, click Choose OS.
- Scroll down and select Use custom.
- Browse to and select
divesoft.img.xz. - Click Open.
Step B4 – Select the SD card
- Click Choose Storage.
- Select your 32 GB micro-SD card.
Make sure you don’t pick an external backup drive.
Step B5 – Write the image
- Click Write.
- Enter your Mac administrator password if asked.
- Wait until writing and verification finish.
- Click Continue and close Raspberry Pi Imager.
- In Finder, click the eject icon next to the SD card (or drag it to Trash/Eject).
- Remove the SD card.
Option C – Windows & macOS (balenaEtcher)
- Go to https://www.balena.io/etcher
- Download and install balenaEtcher for Windows or macOS.
- Start Etcher.
- Click Flash from file and select
divesoft.img.xz. - Click Select target and choose the 32 GB micro-SD card.
- Click Flash! and wait until it’s done.
- Safely eject and remove the SD card.
3. First boot: connect the Raspberry Pi
- Insert the prepared 32 GB micro-SD card into the Raspberry Pi.
- Connect the Ethernet cable from the Pi to your router/switch.
- Connect a monitor (HDMI) and USB keyboard (and optionally a mouse).
- Connect the power supply to the Raspberry Pi.
The Pi will boot from thedivesoftimage. - When the desktop appears, log in if required (use the username/password supplied with the image).
4. Configure Wi-Fi (with monitor + keyboard)
On the Raspberry Pi desktop:
- Look in the top-right corner for the network icon (Wi-Fi symbol or two arrows).
- Click the network icon.
- In the list of networks, click your Wi-Fi network name (SSID).
- Enter your Wi-Fi password.
- Optionally tick Connect automatically so it reconnects next time.
- Click OK / Connect and wait a few seconds.
- The Wi-Fi icon should change to show you are connected.
Now the Pi is online via Ethernet and/or Wi-Fi.
5. Add and configure a printer in the desktop
- Open the main menu (Raspberry icon top-left).
- Go to Preferences → Print Settings or Printers.
- In the printer window, click Add or +.
- Wait while the system searches for printers.
- Select your printer:
- USB printer → choose it from the Local / USB list.
- Network printer → choose it from the Network section.
- Click Forward / Next and follow the prompts to install drivers.
- When asked for a Printer Name, choose a simple, clear name, for example:
DivesoftStickerPrinter
This exact name will be used in Node-RED. - Optionally fill Description and Location.
- Finish the wizard and (optionally) print a test page.
Important: Remember the printer name exactly (case-sensitive). You will need it in the Node-RED flow.
6. Set the printer name in Node-RED
6.1 Open the Node-RED editor
From another computer on the same network, or directly on the Pi:
- Open a web browser.
- In the address bar, go to Node-RED, for example:
http://raspberrypi.local:1880- or
http://<IP-address-of-your-Pi>:1880(e.g.http://192.168.1.50:1880)
- Press Enter – you should see the Node-RED editor.
6.2 Find the printer node
- In Node-RED, open the flow for the Divesoft sticker printer.
- Find the node that handles printing
(labelled something like “Printer”, “CUPS printer”, “Sticker printer”, etc.). - Double-click this node to open its settings.
6.3 Enter the correct printer name
- In the node’s settings, find the field for the printer name / queue name.
- Type the exact printer name you set on the desktop.
Example:DivesoftStickerPrinter - Make sure there are no extra spaces or spelling mistakes.
- Click Done to close the node configuration.
6.4 Deploy the changes
- In the top-right of Node-RED, click Deploy.
- Wait until Node-RED shows that the deployment was successful.
Now the Node-RED flow will send print jobs to the correct printer.
7. Connect the Divesoft analyzer via USB and enable serial output
To allow the Raspberry Pi to receive live measurements from the Divesoft analyzer, you must:
- Connect the analyzer via USB, and
- Enable data output over USB in the analyzer’s menu.
7.1 Connect the Divesoft analyzer to the Raspberry Pi
- Use the supplied USB cable for the analyzer.
- Plug the USB-A side into a free USB port on the Raspberry Pi.
- Plug the other end into the USB port on the Divesoft analyzer.
- Turn on the analyzer.
The Pi will see it as a virtual serial port (internally like a COM/tty device). ManualsLib
7.2 Enable serial/USB communication on the analyzer
On the Divesoft He/O₂ analyzer:
- Turn the analyzer on.
- Make sure you are in the basic measuring mode (normal He/O₂ measurement screen).
- Press the MENU button to enter the main menu.
- Navigate to Menu → Preferences (or Setup → Preferences, depending on firmware). divesoft.com+1
- In Preferences, find the option:
“Send data to USB” - Set “Send data to USB” = ON / Enabled.
This activates sending of measured values over the USB interface as a data stream. divesoft.com+1 - Confirm the change and exit the menu back to the measuring screen.
From now on, whenever the analyzer is connected via USB and turned on, it will continuously send measurement data through the USB-serial connection to the Raspberry Pi.
Your Node-RED flow (or other software on the Pi) can then read this data from the configured serial port and use it for the sticker printer workflow.
8. Optional “more info” links
- Raspberry Pi Imager: https://www.raspberrypi.com/software/
- Raspberry Pi getting started: https://www.raspberrypi.com/documentation/computers/getting-started.html
- balenaEtcher: https://www.balena.io/etcher
- Divesoft He/O₂ analyzer manuals: https://www.divesoft.com/en/support/analyzers/user-manualsdivesoft.com
- Node-RED documentation: https://nodered.org/docs/
Have fun!
If its running, please share a photo on Facebook and please tag https://www.facebook.com/TeamYellowDiving
And no... Divesoft is not a sponsor.

